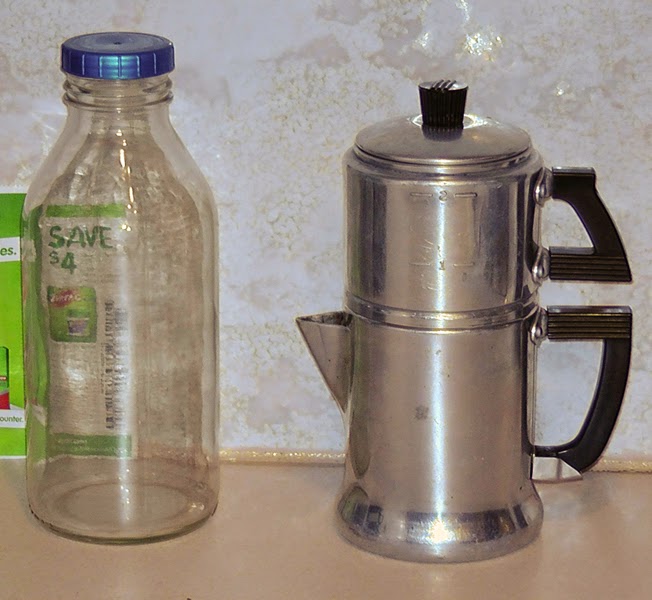
...desperate times call for desperate measures.
Weekends are when I really get to indulge my coffee addiction. I have to get up at 4:15am during the week, so I usually grind what I need on Sunday to save a little time each morning. I run a cup through the Braun and have it with a bowl of cereal. When I get to work at about 5:30am, I wait an hour and a half for the cafeteria to open and get a biscuit (I keep butter & some kinda spread in our little dorm-size fridge, 'cuz they charge for it). I'll have cup of Columbian from our Keurig (*urp*) to wash it down (I keep French Vanilla creamer, too). Then when I get home, I'll usually fix a *good* cup to wash the Keurig out of my mouth. But, I digress...
So, anyway...I've got about a third of a pound of whole-bean dark to last the week, and being the tightwad that I am, was trying to save a few bucks until payday (vacation's coming up in two weeks). I remembered I had some Folger's filter packs (that I had bought during my last vacation) in the pantry, and thought, "Hey, I can use that crap for my morning cup and save the good stuff."
I check the "Best Used By" date and figure I'm good...
So, I break out the Aeropress and brew as I normally would.
Cat-piss. Hopefully, it will be (a little) better coming out of the Braun. (I had read an article about using a French press to salvage crappy coffee, but the Folger's is ground a bit too fine for a press pot. But for now, I've got to get this crappy taste out of my mouth...)
Saturday, February 28, 2015
Wednesday, February 18, 2015
The problem with Ebay is...
...a lot of the people selling stuff have *no idea* how to sell it. For instance...
...this is listed as a "Vintage Flameware PYREX Model 7826-B". Do a search on the Flameware 7826-B, and you'll find this...
...straight from Corelle's website. Flameware coffee pots used a *glass* basket, with aluminum top and bottom pieces, *not* an aluminum basket as in the listing. No mention that is complete (or even missing the top spreader), just that there is no damage.
Here's an example of someone not really sure of what they have, but they want *you* to buy it now! Right now before someone else gets it!
"Want it now? Why wait?? Buy it now!!!" But, it's incomplete. It may have the "strainer" (basket/filter), but the upper pot and lid are missing. "Now..if YOU have any other information or data on this piece and would like to share it..." I do, and no, I'm not going to, because you should *know* what you're selling. Even though it *is* a Hall, and it's only $8.99 (plus $18.28 S&H), it's useless to me. And I'm not really concerned that someone else has their "arrow on the bid button".
Condition, next to completion, is what I look for next. Here's an "Art Deco Coffee Maker", with only the generic Ebay condition listed...
So, word to the wise: spend a little time doing a little research before making a purchase. In many cases, there will be more than just one pot listed, so you can make comparisons (and be certain you're getting all the parts). You'll also find one either in better condition or for a better price (sometimes, *both*). There will be times, though, when you run across that one odd-ball piece; in that case, it takes a bit of digging on the interwebz to get the info you need. Worst case (and I've run across this), you won't find *anything*. Then you just roll the dice (depending on how badly you want it) and hope for the best.
...this is listed as a "Vintage Flameware PYREX Model 7826-B". Do a search on the Flameware 7826-B, and you'll find this...
...straight from Corelle's website. Flameware coffee pots used a *glass* basket, with aluminum top and bottom pieces, *not* an aluminum basket as in the listing. No mention that is complete (or even missing the top spreader), just that there is no damage.
Here's an example of someone not really sure of what they have, but they want *you* to buy it now! Right now before someone else gets it!
"Want it now? Why wait?? Buy it now!!!" But, it's incomplete. It may have the "strainer" (basket/filter), but the upper pot and lid are missing. "Now..if YOU have any other information or data on this piece and would like to share it..." I do, and no, I'm not going to, because you should *know* what you're selling. Even though it *is* a Hall, and it's only $8.99 (plus $18.28 S&H), it's useless to me. And I'm not really concerned that someone else has their "arrow on the bid button".
Condition, next to completion, is what I look for next. Here's an "Art Deco Coffee Maker", with only the generic Ebay condition listed...
Pretty neat moka pot ("stove top espresso maker). The thing to remember about these is the condition of the *gasket*, as it brews under pressure; the gasket must be in good condition in order for it to brew. "My guess is you put it on a stove top to brew it." Yup, that's right. How's that gasket? It's easily obtainable (if you know who made it and what size it is). And although the upper section looks pretty good, the lower part looks kinda funky inside.
One more, and I'll stop...
The West Bend "Kwik Drip". There are a ton of these things on Ebay, ranging from about seven bucks to over $60 (yoiks!). "Vintage" may mean "old", but it doesn't mean it's necessarily *valuable*. This particular pot ($21.99, free shipping) has a very detailed description...but...neglected to add the spreader was missing.So, word to the wise: spend a little time doing a little research before making a purchase. In many cases, there will be more than just one pot listed, so you can make comparisons (and be certain you're getting all the parts). You'll also find one either in better condition or for a better price (sometimes, *both*). There will be times, though, when you run across that one odd-ball piece; in that case, it takes a bit of digging on the interwebz to get the info you need. Worst case (and I've run across this), you won't find *anything*. Then you just roll the dice (depending on how badly you want it) and hope for the best.
Thursday, January 29, 2015
The Hario...
...is dialed in. I pulled the inner burr to get a better consistency, and used two washers under the locknut so my socket could get a better grip. After fiddling around for another 15 minutes or so, here are the results:
2 notches off locked adjustment nut
4 notches
6 notches
8 notches
10 notches
12 notches
Took some doing, but I got the burrs pretty much centered (as I can get), with no drag one notch off the locked adjustment nut. I don't see the need to go stepless. I'll pull out my French press this weekend and see what kind of brew I can get with about a 9 setting. I did a 6 through my Braun (gold mesh filter) and very little sediment. Was it worth all the trouble?
Yeah, sure. I think so.
Wednesday, January 28, 2015
Now, to finish...
...what I started with the Hario. Just got the OE lower bearing kit.
I've already seen the video on its installation; there's not a lot to it.
Just take everything apart, which is really easy.
It's a snug fit between the screw posts, so it *snaps* when it's seated.
Set the outer burr and retaining ring in place, align the screw holes, and install the screws, but don't tighten just yet. I set OE's included washer over the shaft, leaving out the plastic washer that originally was installed...
...then set the inner burr in place, and tighten the retaining ring screws so the outer burr is centered. I used a second washer in place of the other plastic washer, and began the alignment process that was explained in the video. I does take a bit of fiddlin' with, but I got a pretty good alignment in about 25 minutes. By adjusting the inner burr so it's close to the outer burr, I was able to spin the shaft and listen for any dragging caused by misalignment.
I tightened the grind adjustment nut down, then backed off five notches as a starting point. It's said you lose some fine grind capability with the OE bearing, but with the way mine is set up, I'll be able to grind powder. There's still just a *tiny* bit of slop, but it takes out probably 95% of what it is from Hario.
I've already seen the video on its installation; there's not a lot to it.
Just take everything apart, which is really easy.
Contrary to the video, I have to insert the shaft through the top of the tower before installing the bearing due to the nylon sleeve I used at the top.
Set the outer burr and retaining ring in place, align the screw holes, and install the screws, but don't tighten just yet. I set OE's included washer over the shaft, leaving out the plastic washer that originally was installed...
...then set the inner burr in place, and tighten the retaining ring screws so the outer burr is centered. I used a second washer in place of the other plastic washer, and began the alignment process that was explained in the video. I does take a bit of fiddlin' with, but I got a pretty good alignment in about 25 minutes. By adjusting the inner burr so it's close to the outer burr, I was able to spin the shaft and listen for any dragging caused by misalignment.
I tightened the grind adjustment nut down, then backed off five notches as a starting point. It's said you lose some fine grind capability with the OE bearing, but with the way mine is set up, I'll be able to grind powder. There's still just a *tiny* bit of slop, but it takes out probably 95% of what it is from Hario.
Saturday, January 3, 2015
Grind adjustment...
...with the Skerton made easy:
Easy Way to Set the Grind on a Hario Skerton
Actually, pretty good instructions. I set mine to 5 notches from (slightly) locked burrs for use in my Braun (brewing through a gold mesh filter). I got a good, consistent grind with less sediment than I was getting with the Zassenhaus, and made a good cup. The sun's up now, so I'm gonna strip it down, clean it up, and head to Home Depot to see what I can come up with in the way of a "bottom bearing". Stay tuned...
Okay, so I picked up an 8mm lock nut, 8mm flat washer, and a 3/8 x .257 x 1" nylon spacer (I'd seen another mod that used the same spacer but with a .328 hole, but I opted to go smaller and drill it out to fit with less slop). The lock nut will convert the Skerton to stepless adjustment for finer tuning. Off to the garage!
Since the spacer was slightly undersized for the grinder's shaft (and the closest drill bit I had was the same diameter as the spacer's hole), I had to enlarge it a bit with a small rat-tail file. Took a bit of doin', but it'll just slide over the burr end of the shaft and butt up to the adjustment threads.
The piece of rubber mat was used to roll the spacer as I filed, keeping it from slipping. Worked quite well, too. Once the spacer was filed out to where the shaft *just* turns easily, I scuffed the spacer's surface with some 100 grit sandpaper, replaced the burr, and coated the spacer with adhesive (Liquid Nails). I used the notched adjustment nut to snug up the shaft, and it's setting up to dry (24 hours for the adhesive to fully set).
So, for now, it's back to the Zassenhaus. I've only had one cup and *no* breakfast.
Day 2: The Liquid Nails was useless...didn't set, even after all night. So, I cleaned everything up, and found some quick-setting silicone adhesive. I should know how it's going to work in a few hours.
Edit: Success! Zero slop at the top, but still some wobble at the bottom. Looks like I'll be ordering the Orphanespresso lower bearing kit after all. I'm looking for *no* slop, anywhere. At least with the spacer, I won't have to worry about the adjustment threads wallowing out the upper support hole as some folks have found out...
Easy Way to Set the Grind on a Hario Skerton
Actually, pretty good instructions. I set mine to 5 notches from (slightly) locked burrs for use in my Braun (brewing through a gold mesh filter). I got a good, consistent grind with less sediment than I was getting with the Zassenhaus, and made a good cup. The sun's up now, so I'm gonna strip it down, clean it up, and head to Home Depot to see what I can come up with in the way of a "bottom bearing". Stay tuned...
Okay, so I picked up an 8mm lock nut, 8mm flat washer, and a 3/8 x .257 x 1" nylon spacer (I'd seen another mod that used the same spacer but with a .328 hole, but I opted to go smaller and drill it out to fit with less slop). The lock nut will convert the Skerton to stepless adjustment for finer tuning. Off to the garage!
Since the spacer was slightly undersized for the grinder's shaft (and the closest drill bit I had was the same diameter as the spacer's hole), I had to enlarge it a bit with a small rat-tail file. Took a bit of doin', but it'll just slide over the burr end of the shaft and butt up to the adjustment threads.
The piece of rubber mat was used to roll the spacer as I filed, keeping it from slipping. Worked quite well, too. Once the spacer was filed out to where the shaft *just* turns easily, I scuffed the spacer's surface with some 100 grit sandpaper, replaced the burr, and coated the spacer with adhesive (Liquid Nails). I used the notched adjustment nut to snug up the shaft, and it's setting up to dry (24 hours for the adhesive to fully set).
So, for now, it's back to the Zassenhaus. I've only had one cup and *no* breakfast.
Day 2: The Liquid Nails was useless...didn't set, even after all night. So, I cleaned everything up, and found some quick-setting silicone adhesive. I should know how it's going to work in a few hours.
Edit: Success! Zero slop at the top, but still some wobble at the bottom. Looks like I'll be ordering the Orphanespresso lower bearing kit after all. I'm looking for *no* slop, anywhere. At least with the spacer, I won't have to worry about the adjustment threads wallowing out the upper support hole as some folks have found out...
Monday, December 29, 2014
I've been doing a lot of reading...
...on the Hario Skerton grinder. My girlfriend gave me a gift card for William Sonoma for Christmas, so I figure I'll retire my faithful old Zassenhaus and try one of these new-fangled gadgets. I know I'll have to mod it (not for grinding coarse, but to prolong its life by keeping the shaft centered), but I like fiddlin' with stuff. I need to get my hands on it first to best figure out what needs to be done (delivery date is Jan 5).
I run across lots of...opinions...about what is needed to make a good cup of coffee. One fella says "You need a scale. Period." I've been using the scoop that came with my Bodum French press for the past 6 or 7 years, and I've done just fine. I thought about getting a scale, but not for what they're selling for. I've measured the temperature of my water, but more out of curiosity than need. When it comes to a boil, I turn off the heat, simple as that. Sometimes I let the grinds bloom, sometimes I don't (it does look kinda cool). The only real facts I've discovered when brewing is:
Use the right amount of hot water (11 ounces).
Use the right amount of good beans (two scoops).
Use clean stuff.
Combine all three for sufficient time (depending upon the method used).
After nine years, I've developed what works best for me. Your mileage may vary.
(Four days later...)
Let the modding begin.
I run across lots of...opinions...about what is needed to make a good cup of coffee. One fella says "You need a scale. Period." I've been using the scoop that came with my Bodum French press for the past 6 or 7 years, and I've done just fine. I thought about getting a scale, but not for what they're selling for. I've measured the temperature of my water, but more out of curiosity than need. When it comes to a boil, I turn off the heat, simple as that. Sometimes I let the grinds bloom, sometimes I don't (it does look kinda cool). The only real facts I've discovered when brewing is:
Use the right amount of hot water (11 ounces).
Use the right amount of good beans (two scoops).
Use clean stuff.
Combine all three for sufficient time (depending upon the method used).
After nine years, I've developed what works best for me. Your mileage may vary.
(Four days later...)
Let the modding begin.
Saturday, December 6, 2014
Vintage Durobor...is it...
...a press pot or a pour-over?
Stainless steel Durobor flanked by the lower & upper aluminum model
From what I've found
online, this is supposed to be the correct method to brew using one of
these things. I did experiment, after doing this video, with actually
*pressing* after letting the grinds bloom. Nope, not the way to do it.
Much better results by placing the press piece on top of the grounds,
*then* pouring the water in. Acts the same as a spreader in a
dripolator. Anyway, if you get one of these, play around with it and see
what you can do.
Wednesday, November 26, 2014
In my personal collection...
...I've tried to acquire as many different types of brewing devices as there are. So far, I have:
(1) 1930s-era Silex 8-cup vacuum pot
(9) 2- to 8-cup dripolators, ranging from pre-WWI to 1960s
(5) percolators, from a late-'40s Pyrex Flameware 4-cup to a modern 3-cup Rapid Brew
(3) 6-cup moka pots: 2 aluminum Bialettis and a stainless steel Vev Vigano
(2) "stove top espresso makers", a 9-cup Via Veneto CX-25 (older model) and a 12-cup Vesuviano (1950s-60s?)
(2) Napoletanas ("flip pots")
Various other devices, such as Durobor press pots, pour-overs, a French press, an Aeropress, the "Ideal" immersion pot, and (3) auto-drip machines. I'm up to 34 so far, and have a few coffee-related items such as this demitasse cup & saucer...
A William Rogers & Son sugar bowl (with non-matching spoon), $2 at a flea market...
I used to have a ton of coffee cups, old restaurant china from like the '50s & '60s. That heavy stuff that would break a toe if you dropped it. Homer Laughlin and Fire King were my favorites; but I also had Shenago, Jackson, and Buffalo. Cups, mugs, saucers, plates, gravy boats, platters, and creamers. I might have a dozen mugs left, if that many. One Homer Laughlin mug I use for shaving (yes, I still use a brush and a '70s Gillette double-edge adjustable). I also have a huge Faberware 36-cup urn (no guts, though) and a Bunn single warmer.
I think the oddest piece I have is a little (tea?) kettle I found in an antique shop outside of Wimberley a couple of years ago...
The only markings are "18-8 Stainless Steel Made in Japan" on the bottom. A cylindrical wire mesh filter snaps onto the lid, and fits to within like 3/16" from the bottom. I'm thinking this is more for brewing loose-leaf tea than for coffee, but could be used with a fairly coarse grind. I couldn't find another like it anywhere on the interwebz, though. One-of-a-kind? It would be cool if it was.
(1) 1930s-era Silex 8-cup vacuum pot
(9) 2- to 8-cup dripolators, ranging from pre-WWI to 1960s
(5) percolators, from a late-'40s Pyrex Flameware 4-cup to a modern 3-cup Rapid Brew
(3) 6-cup moka pots: 2 aluminum Bialettis and a stainless steel Vev Vigano
(2) "stove top espresso makers", a 9-cup Via Veneto CX-25 (older model) and a 12-cup Vesuviano (1950s-60s?)
(2) Napoletanas ("flip pots")
Various other devices, such as Durobor press pots, pour-overs, a French press, an Aeropress, the "Ideal" immersion pot, and (3) auto-drip machines. I'm up to 34 so far, and have a few coffee-related items such as this demitasse cup & saucer...
Ter Steege BV Delft Blauw
A '50s Inland carafe and warmer stand...
A William Rogers & Son sugar bowl (with non-matching spoon), $2 at a flea market...
Not really coffee-related, but for 50 cents, I couldn't pass it up...
1930's "Kellogg's Correct Cereal Creamer"
I used to have a ton of coffee cups, old restaurant china from like the '50s & '60s. That heavy stuff that would break a toe if you dropped it. Homer Laughlin and Fire King were my favorites; but I also had Shenago, Jackson, and Buffalo. Cups, mugs, saucers, plates, gravy boats, platters, and creamers. I might have a dozen mugs left, if that many. One Homer Laughlin mug I use for shaving (yes, I still use a brush and a '70s Gillette double-edge adjustable). I also have a huge Faberware 36-cup urn (no guts, though) and a Bunn single warmer.
I think the oddest piece I have is a little (tea?) kettle I found in an antique shop outside of Wimberley a couple of years ago...
The only markings are "18-8 Stainless Steel Made in Japan" on the bottom. A cylindrical wire mesh filter snaps onto the lid, and fits to within like 3/16" from the bottom. I'm thinking this is more for brewing loose-leaf tea than for coffee, but could be used with a fairly coarse grind. I couldn't find another like it anywhere on the interwebz, though. One-of-a-kind? It would be cool if it was.
Saturday, November 22, 2014
"The 'Perfect' Cup of Coffee"...
...doesn't exist. Sorry, all you YouTube coffeshops/roasters/"baristas". That's just a proven statement, because everyone else's tastes don't necessarily jibe with yours.
I don't worry about showing *you* how to brew the "best" or "perfect" cup. I concentrate on showing you how to use these obsolete dinosaurs (and throw in some tips that work for me). It takes time and practice, experimenting with different beans, grinds, and brew times to suit *your* tastes. Frankly, I use the same grind for my Braun as I do with the Wilbur, or my Melitta 101, or my Aeropress, and get the results that suit me just fine. I do make exception when using my French press, of course, and adjust my brewing time accordingly. Just like any other recipe, you tweak it to suit you.
Any one brew method is no better than the other. "Derrrr, Chemex make the best...". For you, maybe. Some folks on Ebay sure are proud of 'em (btw...William Sonoma has the 6-cup for under $40, just sayin'). Even *my* favorite method changes. When I first started using the little Silex 2-cupper, I thought I wouldn't ever use anything else...until I got the Wilbur. So so happens I just finished a cup made with it. When I'm in a hurry, I use the Braun. It's been making a great cup for the past nine years. I may go back in the kitchen in a few minutes and use the Aeropress. Point being, I don't stick with one method. I like to play with my stuff and see what I can concoct.
Even the roast of the bean. I personally prefer a dark roast, Italian being one of my favorites. But I've found a good Sumatran medium roast that's equally pleasing. Lighter roasts don't grind (by hand) as smooth as darker roasts; I reckon that's due to the oily surfaces on the beans. I'm not a scientist, so I'm just guessing. But I know what *I* like.
So when you watch these videos and some Poindexter pulls out the scale and thermometer, take it with a grain of salt. Just keep your pot clean, use good beans (with a good scoop) and fresh water (just under a boil), and pay attention to what you're doing. Find what works for *you*...then keep working on it.
(Well, I didn't use the Aeropress...but I think I found Wilbur's sweet spot. Yeah. That's the stuff...)
I don't worry about showing *you* how to brew the "best" or "perfect" cup. I concentrate on showing you how to use these obsolete dinosaurs (and throw in some tips that work for me). It takes time and practice, experimenting with different beans, grinds, and brew times to suit *your* tastes. Frankly, I use the same grind for my Braun as I do with the Wilbur, or my Melitta 101, or my Aeropress, and get the results that suit me just fine. I do make exception when using my French press, of course, and adjust my brewing time accordingly. Just like any other recipe, you tweak it to suit you.
Any one brew method is no better than the other. "Derrrr, Chemex make the best...". For you, maybe. Some folks on Ebay sure are proud of 'em (btw...William Sonoma has the 6-cup for under $40, just sayin'). Even *my* favorite method changes. When I first started using the little Silex 2-cupper, I thought I wouldn't ever use anything else...until I got the Wilbur. So so happens I just finished a cup made with it. When I'm in a hurry, I use the Braun. It's been making a great cup for the past nine years. I may go back in the kitchen in a few minutes and use the Aeropress. Point being, I don't stick with one method. I like to play with my stuff and see what I can concoct.
Even the roast of the bean. I personally prefer a dark roast, Italian being one of my favorites. But I've found a good Sumatran medium roast that's equally pleasing. Lighter roasts don't grind (by hand) as smooth as darker roasts; I reckon that's due to the oily surfaces on the beans. I'm not a scientist, so I'm just guessing. But I know what *I* like.
So when you watch these videos and some Poindexter pulls out the scale and thermometer, take it with a grain of salt. Just keep your pot clean, use good beans (with a good scoop) and fresh water (just under a boil), and pay attention to what you're doing. Find what works for *you*...then keep working on it.
(Well, I didn't use the Aeropress...but I think I found Wilbur's sweet spot. Yeah. That's the stuff...)
Tuesday, November 18, 2014
So, you wanna buy...
...an old coffee pot? Cool. But...why? What are you gonna do with it?
Some folks buy old coffee pots to set on a shelf, for decoration. Maybe their kitchen is a rustic design and it fits with the theme. If that's the case, they aren't going to worry that the insides (like the pump & filter assembly in a percolator) are missing. As long as it looks cool and funky, they're good.
Others use old coffee pots as a "canvas", painting and displaying them as works of art...
Some folks buy old coffee pots to set on a shelf, for decoration. Maybe their kitchen is a rustic design and it fits with the theme. If that's the case, they aren't going to worry that the insides (like the pump & filter assembly in a percolator) are missing. As long as it looks cool and funky, they're good.
(From: Organized Clutter)
Others use old coffee pots as a "canvas", painting and displaying them as works of art...
(From: Follow Pics)
Me? I buy 'em to use. Well, the smaller ones, anyway, seeing how I'm the only coffee drinker in the house, but still. My primary concern is completeness. After all, if I can't brew with it, it's of no use to me. I have made exceptions, of course. Like the 24 ounce/12-cup Vesuviana I found in a bin at Goodwill. It was dirty, the gaskets were shot, and the pot was missing...
...but it was cool and cost me all of $4.26. I cleaned it up, ordered a gasket set from Orphanespresso, and found a pot (albeit a 9-cup) on Ebay. And it works.
Most of the pots I've gotten off Ebay; you learn real quick to research what's available to make sure what you're getting has all the parts. The first (aluminum) Durobor pour-over I bought didn't have the spreader/press plate. I later scored a stainless steel Durobor, but USPS found it necessary to drop-kick it into the back of their truck and broke the glass. Luckily, they were both the same size, so I took the glass from the first one to use with the second.
Condition is a close second; I don't mind a few small dents. They give the piece character. And I expect to have to give it a good cleaning; that's a given. But I'm leery about listings that show only one side, or don't show all the parts. If it's interesting, I'll fire off a question, but most of the time I pass those up. I've always found similar pots in better shape, and sometimes at a better price. The "Ideal" is a perfect example. Many I'd found had pretty rough filter tubes...dented, distorted...so I took the extra time and found one with good tubes and a pretty decent price (about $20). Which leads me to...
...how much is this thing gonna cost me? I don't think I've spent more than $35 on any one pot (and I'll have wanted it it awful bad to pay that much, like the Silex 2-cupper), and for that much, it better be in really good shape with all the parts. I spend quite a bit of time going through listings to see what's up for bid. If I run across one that catches my eye, I keep going to see if there's another, better buy. And there usually is.
I've run across an awful lot of crap on Ebay, too. Look...just because it's old doesn't mean it's valuable. I've seen junk go for more than one that's barely been used (and might even have the original box and instructions). I love the "Oh, I'm not an expert..." line, too. I don't claim to be one, either, but at least I'll find out enough to know if all the parts are there. And some are just so nasty that I'd be ashamed to even list it in the first place. It's an old coffee pot, not an 1882 Carson City Morgan silver dollar. At least rinse it out!
Saturday, November 15, 2014
Sunday, November 9, 2014
The "Ideal" way to brew coffee...
...back in the early 1900's, anyway, was with the "Ideal" Coffee Pot.
Quite a difference a hundred years makes. And as we found out from Jitterbuzz, the "TACUCo" stamp was used from 1901-1925. This pot's stamp...
...adds its patent date as June 10, 1902. It's 10" tall and 6" at the base, about 8 cups. It has an odd filtering system, consisting of two perforated cylinders that fit one inside the other.
I was fortunate enough to find instructions to this thing. Ground coffee is place between the two cylinders, and boiling water is poured into the smaller one. Once filled, the pot is placed "where it will keep hot (but not boil) from three to ten minutes (not more than ten minutes)". I reckon that means you could keep it over very low heat until the brewing time is complete.
The only reason I haven't used it yet is I don't want to make a full 8-cup pot.
Sunday, November 2, 2014
Another interesting design...
...is the Napoletana, or Neapolitan flip pot. Basically, one pot sitting on top of another, with what looks like a salt shaker between them.
Marked "Made in Italy" and "T.6" ("6 cup"?) on the bottom
Although it has an Italian-sounding name, this gadget was actually invented by a Frenchman by the name of Morize, back in 1819.
The Napoletana consists of a server (the pot with the spout), a boiler (where the water is heated), and a filter (that contains the ground coffee). Simply filler the boiler with water (up to a small weep hole near the top) and place it in the stove. Unscrew the perforated cap of the filter and fill the canister with medium-fine ground coffee, and replace the cap. Place the filter into the boiler, and press the server on top of the boiler. Once water begins to boil, it will start coming out the weep hole; shut off the heat, and flip the whole thing. Gravity does the rest...water slowly flows through the grounds, and the resulting brew drips into the server. Once brewing is finished, remove the boiler/filter, place the lid on the server, and enjoy! Strength of the brew can be adjusted by using a fine grind for a stronger brew, and a coarser grind for a mild brew.
Napoletanas can be made from aluminum, stainless steel, or copper, and range in size from single-serving (or rather, 2-cup, depending on the size of cup used) to (at least) 9-cup (largest I've seen so far). Some have Bakelite handles, while other have simple horizontal wood or metal handles that stick straight out...or a combination of the two. Some even have their own stands and burners...
(Image courtesy http://www.espressomadeinitaly.com )
Wednesday, October 29, 2014
A modern twist...
...on the pour-over...the Z|E|V|R|O "Incred-A-Brew".
Got this from Bed Bath & Beyond for $20. Simple to use, easy to clean, and makes a good cup of coffee. I'll probably take this along on my next camping trip.
Saturday, October 25, 2014
There are some who say...
...the Aeropress is the easiest, bestest way to make coffee.
Aerobie Aeropress (stock photo)
Granted, it makes a good cup of coffee; what you won't get (regardless of what's printed on the box) is espresso.
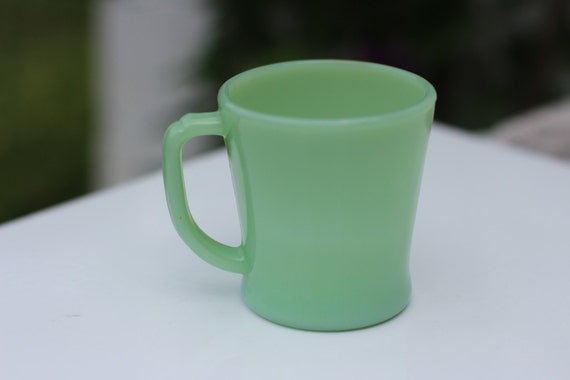
Using the Aeropress as per the instructions will produce a coffee concentrate. You then dilute it with hot water, basically making an Americano. That's all fine and dandy, but my Fire King Jadeite D-handle mug is just the right size for this thing to make a good cup using just under one (Aeropress) scoop (which is about 15-17 grams, depending on whose article you're reading), as opposed to the 7 gram Bodum scoop I use for everything else (I've swapped scoops since this video was made). I fill my mug nearly to the top with cold water, dump it in my vintage Sona Ware J901 kettle, and light it up. While the water's heating, I place a filter into the filter holder and wet it. Using the inverted method will give you the best results, and is easier, that the "traditional" method. Stick the plunger section into the brewing chamber just to where the rubber part is completely inside, and turn the whole thing upside-down. Dump in your coffee (I use a medium-fine grind), and pour in just enough hot water to cover the grounds, letting it bloom for 10-15 seconds or so. Or, you can slowly pour in the whole pot, stirring as you go. Twist on the filter cap, and let it steep for as long as what meets your taste. I've been doing 30 seconds, with a 50 second plunge. Make sure you keep a good grip on this thing so it doesn't slip. Plunge away until you hear a soft *hisssss*; this means you've run out of water, and your brew is ready to enjoy. To clean, just twist the filter cap off (the paper filter and coffee grounds, or "puck", will remain in the chamber. Plunge the puck out into the trash and rinse it off. Don't leave the plunger's rubber part in the brewing chamber to ensure it will always fit tightly.
As with any other method, it takes some trial and error and a bit of tweaking to get your brew to suit your taste. But I must admit...as old-fashioned, hard-headed, and resistant to change that I am, I'm beginning to like what this crazy thing is capable of.
Thursday, October 23, 2014
The simplest way to make (good) coffee...
...is with a pour-over. Among my various coffee makers is a vintage (c.1950s?) Melitta 101 3-hole cup-top "Kaffeefilter" in white ceramic.
Since size 101 filters are next to impossible to find here in the States, I use Melitta's #2 brown cone filters, and fold the side seam twice instead of just once. This gives the filter the correct diameter (or close enough, anyway). I wet the filter down with hot water to wash away any loose fibers, and to pre-heat it. Add two (7 gram) scoops medium-fine ground coffee, and slowly pour 10 ounces of water (just under boil), slightly stirring to keep the grounds good and saturated. Brews in about 3 1/2 minutes.
Tuesday, October 21, 2014
Although it's the same principle...
...all dripolators are not created equal...

"Genuine Drip-o-lator" 2-cup, Dunbar glass, possibly 1940's vintage
... but all are capable of making a great cup of coffee.
Wear-ever 3042 2-cup, early 20th Century ("TACU" stamped)
Like any other method (short of one using those silly little plastic cups or "pods"), it takes a little trial and error to get the right grind and coffee to water ratio to suit your own personal taste, but they're simple to use and the result is worth it.
Great for camping, too, since no electricity is required. But, like I said before, there's little information on this particular style of brewer. But, fortunately, there are still some sites that strive to keep the memory alive...
"Guardian Consistently Good Coffee"

- Heat the beverage urn by rinsing with hot water.
- Place dripper in top of urn and put filter disc with seam side down in bottom of dripper.
- Measure into dripper, 2 teaspoons (1 level tablespoon, if a richer flavor is desired) of standard or drip grind coffee per cup. Do not use pulverized coffee*.
- Place water distributor over coffee, pressing down firmly but not tight.
- Pour in actively boiling water to desired measure. Use fresh cold water brought to a rolling boil. (Dripper is marked 2–4–6–8 cups.) For ten cups, measure proper amount of coffee in dripper, add eight cups of boiling water and when filtered thru, add 2 cups clear boiling water and mix.
- Cover and place over very low heat or on warm part of stove. Allow about 1 minute per cup for coffee to drip.
- When coffee has dripped thru, remove dripper, place cover on urn, adjusting cover with long flange in front of spout to retain heat.

*Some espresso grinds may work, but pulverized varieties like Turkish or Greek coffee may leave a gritty finish
Guardian 8-cup (aluminum lid, pre-war; glass lid, war era)
(Text & images courtesy The Guardian Service Ware Blog)
All of these particular styles require a separate kettle for heating and dispensing water. As far as I know (so far, anyway), only the Corning, with its ingenious control valve, does not. So, being the only coffee drinker in my household, I needed an equally-vintage kettle...
Subscribe to:
Posts (Atom)


.jpg)